Getting Started
Creating a New Drawing
To create a new Electra drawing, open the New Electra drawing template and a copy of the template will then be available for your usage. Users can further customize this template to suit their own requirements, to load their own custom stencils, loading databases from a network server or any other modifications.
Stencils and Drawing Area
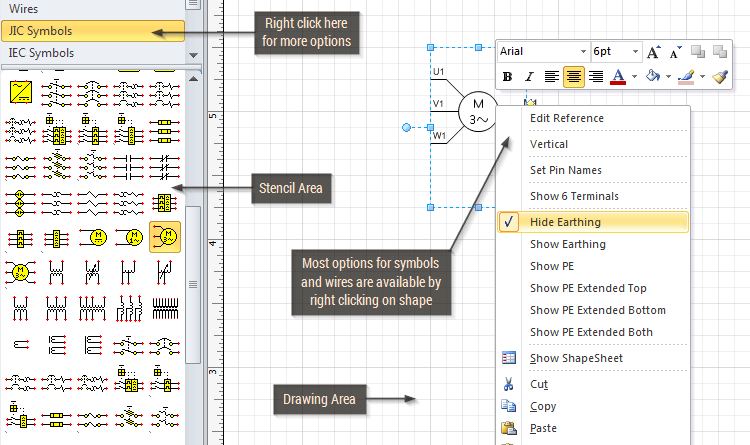
On the left of the Visio screen are a list of stencils, which contains a collection of symbols that you can drag and drop onto your drawings. The shapes on a stencil are called Master shapes or Masters. All stencils can be configured to display symbols in multiple ways, so please right click and explore display options.
Placing Shapes
Placing a shape onto the drawing is as easy as dragging a shape from the stencil and dropping it onto your drawing. If you drag a wire or a symbol onto your drawing, it will be automatically and incrementally renamed. Most shapes in Electra have intelligence that will enable you to complete your drawings faster and with less error.
Double click or right click on a symbol/wire to access the Reference/Wire Name window. The Reference window (for symbols) and the Wire Name window (for wires) provide a quick and easy way to edit your drawings. Designed for minimal typing, the window comes with real time cross reference information and easy spin buttons that helps you complete your drawings quickly.
Positioning Text
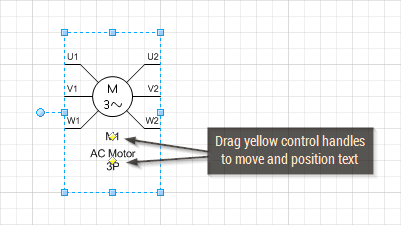
Symbols and wires in Electra have yellow control handles that let users re-position text easily. Simply drag on yellow control handles to move them to a new position.
Connection Points
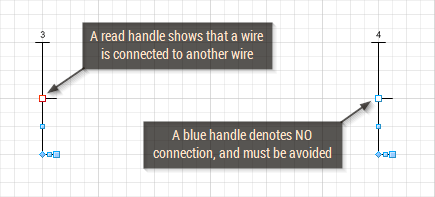
Most shapes in Electra have connections points to allow one shape to connect to another (e.g. connecting a wire to a symbol). Although they are visible in the drawing, they are not printable, meaning they will not appear on the printed hard copy (In Visio 2010 and above, they are dynamically hidden and shown, as you drag a wire near a symbol). They also act as glue points to allow easy connections.

When a wire is dropped on another, Electra automatically creates a connection point, connect the wires together, and insert a connection dot to denote a connection. When a wire is moved away, Electra automatically deletes the connection points. Connection dots can also be manually turned on or off by right clicking on a wire. In addition, you can easily add connection points to any shape by first clicking on a shape, then clicking on the connection point tool, and then pressing CTRL key and clicking on anywhere you would like to add a connection point.
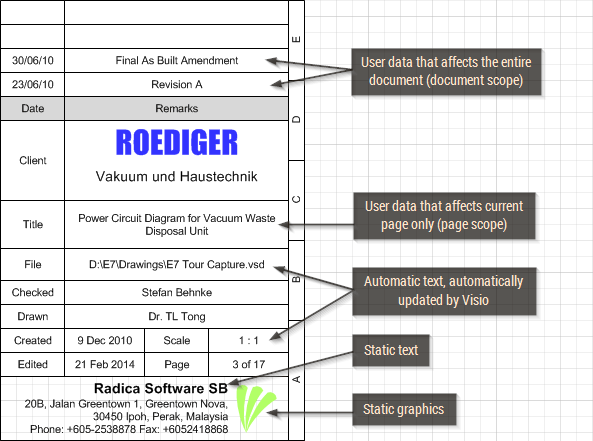
Title Blocks
Electra includes powerful title block shapes that let users generate Table of Contents and modify information that affects a page or the entire document. Drag and drop intelligent title block shapes from the Title Block stencil or create your own shape by using menu Electra | Title Blocks | Insert Title Block Data. Once you have placed all necessary title block shapes, group them together and click menu Electra | Title Blocks | Create Title Block, and Electra will automatically insert data and intelligence to create your custom title block. To use your custom Title Block, simply drag and drop them onto your drawing and Electra will automatically centers your title block. Right click on your title block and select Edit Title Block to edit title block information.
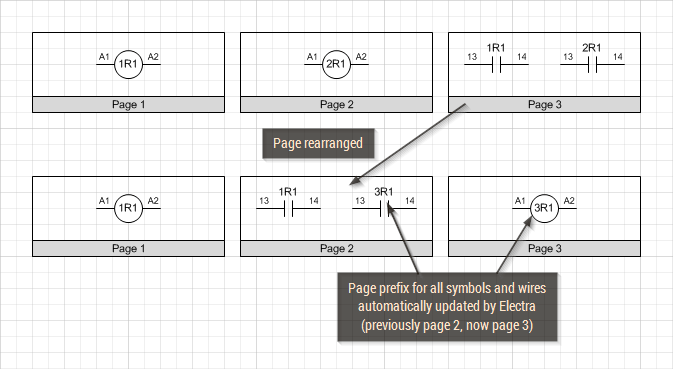
Page Prefixes
One of the most powerful tools in Electra is page prefix and users can use them on both symbols and/or wires. Page prefix adds a page number in front of your symbol reference or wire name and automatically keeps track and updates this page number even when you re-order your pages, all automatically.